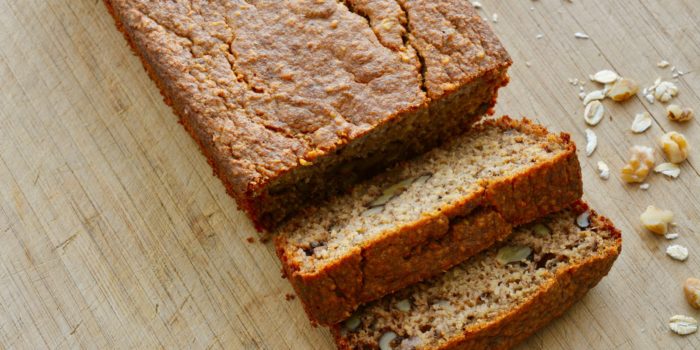
Huh? Gluten free, sugar free, and dairy free banana bread? Should the title also say…
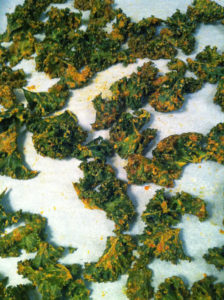
“Cheesy” Vegan Kale Chips
My sister-in-law was in town recently for a visit and she was my inspiration for making these “cheesy” vegan kale chips. You see, she is a very healthy and clean eater. She doesn’t claim to be vegan but she can often be seen enjoying vegan foods.
I, myself, try to make healthy choices, or at least what I’ve found to be healthy for me. When it comes to my grocery cart, you will find that most of my purchases are organic and mainly consist of whole foods such as nuts, vegetables, fruits, and proteins.
And while I do consume meat and dairy products, I’m all for trying a recipe that eliminates both, but is still satisfying. That’s where these “cheesy” vegan kale chips come into play. My sister-in-law bought several bags of kale chips while she was here and inspired me to make my own.
Most recipes that I found call for a food dehydrator as you can control the temperature more easily. Also, because it’s such a low temperature, the product actually remains “raw” and none of the nutrients are lost (at least that is what I’ve read). But since I don’t have a dehydrator I decided to use my oven on the lowest temperature and the results were great! I can’t vouch for all of the nutrients being there, but they certainly were crisp, and lets face it, any kale chip has got to be healthier for you than a regular chip!

So without further ado, here is the method I used:
Ingredients:
2 bunches of organic kale
2 cups organic cashews (raw is recommended, but I only had roasted and salted so I soaked them in water for a little over an hour beforehand and then drained them)
1 organic red bell pepper, seeded and chopped
1 clove peeled garlic
2 tablespoons fresh squeezed lemon juice
1 tablespoon olive oil
8 tablespoons nutritional yeast (many grocers carry this in the bulk bins)
1 teaspoon sea salt
½ teaspoon cumin
½ teaspoon turmeric
Cayenne pepper, ground chipolte pepper and smoked paprika to taste
(You’ll notice that the last 3 ingredients are “to taste” and really, all of the spices can be considered as such. You can add any spices you’d like! After whizzing the mixture up, give it a taste and see what needs to be adjusted according to your palate.)
Instructions:
Preheat oven to your lowest setting
1. Wash the kale and remove the leaves from the stems. Tear into bite-sized pieces and then dry.
2. In a food processor, puree the cashews, bell pepper, and garlic. Add the lemon juice, olive oil, yeast and seasonings, then puree until creamy. If the mixture is too thick, water can be added in small increments until it resembles something like a pancake batter.
3. Taste your puree and adjust any seasonings you’d like. You can add a dash more of any that are called for or sprinkle in another spice that you think would be tasty. If you want an even cheesier taste, add more nutritional yeast.
4. Toss the pieces of kale with the puree in a large bowl. Continue to mix until it is evenly distributed on all of the kale pieces. (In my experience, if a piece of kale was overly saturated with the puree it didn’t crisp up as nicely.)
5. Cover 3 cookie sheets with parchment paper and arrange the kale in a single layer on the paper. It is best if the pieces do not overlap.
6. Place in the oven. Cooking times will likely vary depending on your oven. The lowest setting on mine is 200 degrees. I baked my kale for about 4 hours turning once midway through.
Once they were done I allowed them to cool completely before storing them in an air-tight container. I did notice however, that by the next day or so, they were starting to lose some crispness. I reheated them in the oven and it brought the crunch back. I’m wondering how to avoid the need to do that? I thought about placing a little mesh bag of rice at the bottom of the container since rice is supposed to absorb moisture, but I have yet to try that out. Has anyone had success with keeping them crisp?
The end results were delicious! My husband loved them as did a friend of ours, who promptly made a batch of her own that weekend.
If this recipe seems out of the box for you and you are nervous to invest the time and ingredients to making your own, I’d suggest buying a bag first. This will give you an idea of the flavors you can achieve and it just might inspire you to make a batch yourself!
Related Posts
Comments (0)